Deploying WildFly on IBM i (using GitBucket as a sample application)
Deploying WildFly on IBM i (using GitBucket as a sample application)
This simple guide is intended to help you deploy your first application in WildFly standalone mode. For this exercise, we use GitBucket as a sample application. You can similarly deploy any .war file using these steps
Prerequisite setup
As with any open source software, it is recommended that you use an SSH terminal session to perform these tasks. QSH or other 5250 interfaces may work, but can be problematic.
Run bash and set appropriate environment variables
These steps assume you are running with SSH and using bash as your default shell.
If you’re not running bash, you can run it explicitly:
exec /QOpenSys/pkgs/bin/bashIf you haven’t already customized your PATH to include open source, you can do that temporarily:
export PATH=/QOpenSys/pkgs/bin:$PATHChoose installation and download directories
Save your installation and download directory in environment variables (these are only used for convenience during the steps in this guide):
export DOWNLOAD=/opt/download
export WILDFLY=/opt/wildfly
The aboves assumes the following directories:
- WildFly installation directory:
/opt/wildfly - Download directory (when downloading WildFly and GitBucket):
/opt/download
You may choose to download files or deploy WildFly anywhere on the filesystem. Just change these values accordingly.
(subsequent steps assume you are using this same SSH session)
Create installation directory and download directory
mkdir -p $DOWNLOAD
mkdir -p $WILDFLY
Step 1: Install Required Software
yum install wget tar-gnu gzip nano openjdk-11Alternatively, use Access Client Solutions to install these packages.
Step 2: Download WildFly
Technique 1: Using wget
(change the version number, if needed, to the version you would like to install)
cd $DOWNLOAD
wget https://github.com/wildfly/wildfly/releases/download/28.0.0.Final/wildfly-28.0.0.Final.tar.gz
Technique 2: Manual download
Just navigate to the WildFly website and access the downloads.
Download the latest version in .tar.gz format. Once downloaded, place in the download directory chosen earlier.

Step 3: Install WildFly
(change the version number in the filename, if needed, to the proper version)
cd $DOWNLOAD
tar --strip-components=1 -C $WILDFLY -xzvf wildfly-28.0.0.Final.tar.gz
Step 4: Configure WildFly to use Java of choice
Open the standalone.conf file located in the /bin directory of the WildFly installation directory.
For this, you can use the editor of your choice (assuming you have a drive mapped with sshfs or NetServer),
or you can use a terminal-based editor like nano:
cd $WILDFLY/bin
nano standalone.conf
The default standalone.conf file has a commented-out line with a JAVA_HOME value. Uncomment the line and
insert the appropriate JAVA_HOME value. You can choose between OpenJDK or JV1 versions of Java.
For OpenJDK:
JAVA_HOME="/QOpenSys/pkgs/lib/jvm/openjdk-11"For JV1:
JAVA_HOME="/QOpenSys/QIBM/ProdData/JavaVM/jdk11/64bit"Step 5 : Configure server address (optional)
This step is recommended so that WildFly’s default behavior is to bind to the correct addresses. If you do not do this step, you will need to specify the addresses on the command line later when you start WildFly.
Open the standalone.xml file in the standalone/configuration directory
of the WildFly installation directory.
For this, you can use the editor of your choice (assuming you have a drive mapped with sshfs or NetServer),
or you can use a terminal-based editor like nano:
cd $WILDFLY/standalone/configuration/
nano standalone.xml
Search for the <interfaces> tag (in nano, this can be done with ctrl+W). You will find a section that defines
the management and public interfaces. Note that there are other tags that mention “interfaces” but here you only
need to find the specific <interfaces> section.
    <interfaces>
        <interface name="management">
            <inet-address value="${jboss.bind.address.management:127.0.0.1}"/>
        </interface>
        <interface name="public">
            <inet-address value="${jboss.bind.address:127.0.0.1}"/>
        </interface>
Change these values to something appropriate for your deployment. For instance, the following
configures the management interfaces to use 0.0.0.0 (listens on any address), and it
configures the public interface (used for web applications) to the IP address of the IBM i
system. In the default configuration, these interfaces are only accessible from the local system.
    <interfaces>
        <interface name="management">
            <inet-address value="${jboss.bind.address.management:0.0.0.0}"/>
        </interface>
        <interface name="public">
            <inet-address value="${jboss.bind.address:0.0.0.0}"/>
        </interface>
Step 6: Create a management user
First, set JAVA_HOME to the value you configured in standalone.conf:
export JAVA_HOME=/QOpenSys/pkgs/lib/jvm/openjdk-11or…
export JAVA_HOME=/QOpenSys/QIBM/ProdData/JavaVM/jdk11/64bitThen run the add-user.sh script
cd $WILDFLY/bin
./add-user.sh
Follow these steps:
- When it asks, “What type of user do you wish to add?”, enter “a” for management user
- For “Username”, enter
admin - Enter
ato choose “a) Update the existing user password and roles” - Follow the remaining prompts to choose a password. Just press [enter] to accept the defaults for all other questions.
Step 7: (optional) Deploy GitBucket by downloading and placing in deployments directory
If you skip this step, you can deploy GitBucket through WildFly’s management interface later
cd $DOWNLOAD
wget https://github.com/gitbucket/gitbucket/releases/download/4.37.1/gitbucket.war
cp gitbucket.war $WILDFLY/standalone/deployments
Alternatively, manually download the latest gitbucket.war and place in the standalone/deployments directory.
Now, the GitBucket application will be deployed when WildFly is started.
Step 8: Start WildFly
If you configured the server addresses in step 5, you can now start WildFly in standalone mode by doing the following:
cd $WILDFLY/bin
./standalone.sh
If you did not configure the server addresses, you may specify them on the command-line
invocation of standalone.sh using the -b and -bmanagement arguments, for instance:
cd $WILDFLY/bin
./standalone.sh -b 171.20.0.10 -bmanagement 0.0.0.0
You’re done!! At this point:
- The management interface will be running at
http://<your_server>:9990/(log in withadminand the password you created earlier) - If you deployed GitBucket in Step 7, it will be running at
http://<your_server>:8080/gitbucket
If you didn’t deploy GitBucket, you can do so through the management interface by doing the following steps:
-
Download the latest release of GitBucket from their releases page on GitHub (in the form of
gitbucket.war) to your PC -
Open your browser to
http://<your_server>:9990/(log in withadminand the password you created earlier) -
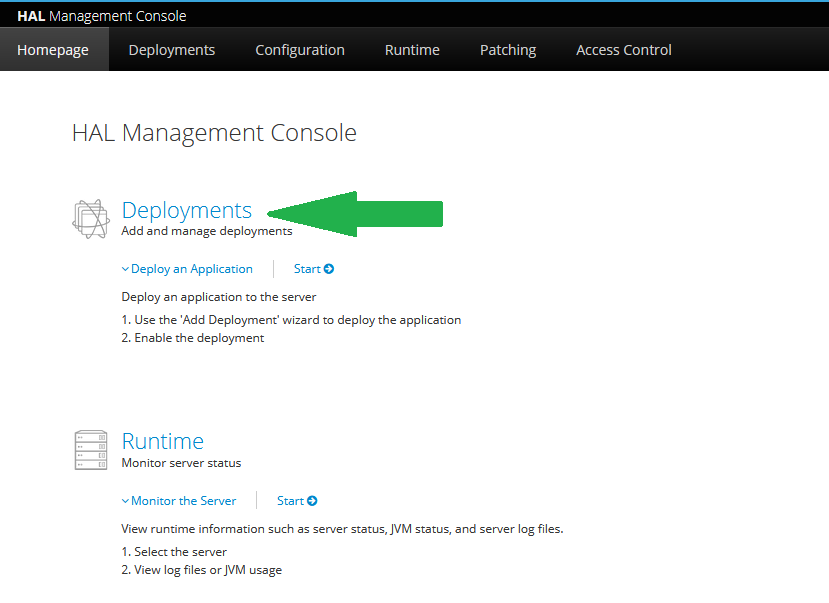
Click the “Deployments” tab or the “Deployments” link on the homepage
-
Click the action button in the left sidebar and choose “Upload Deployment”

-
Follow the prompts to upload
gitbucket.warfrom your PC and specify application names
-
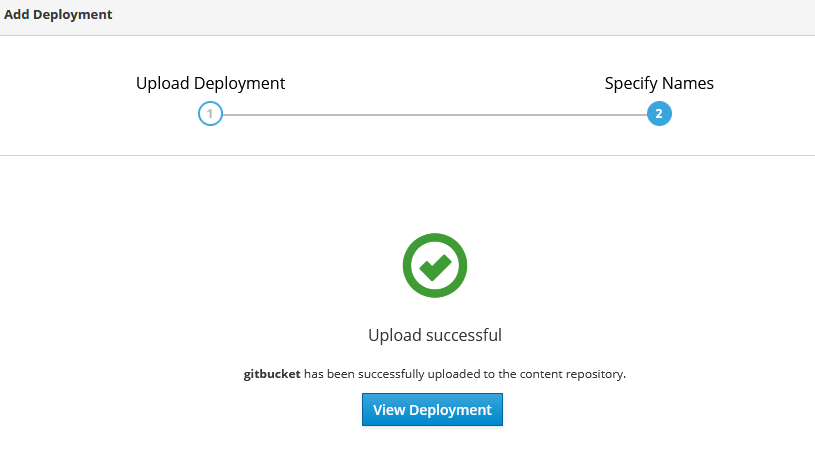
On success, it should show upload complete
-
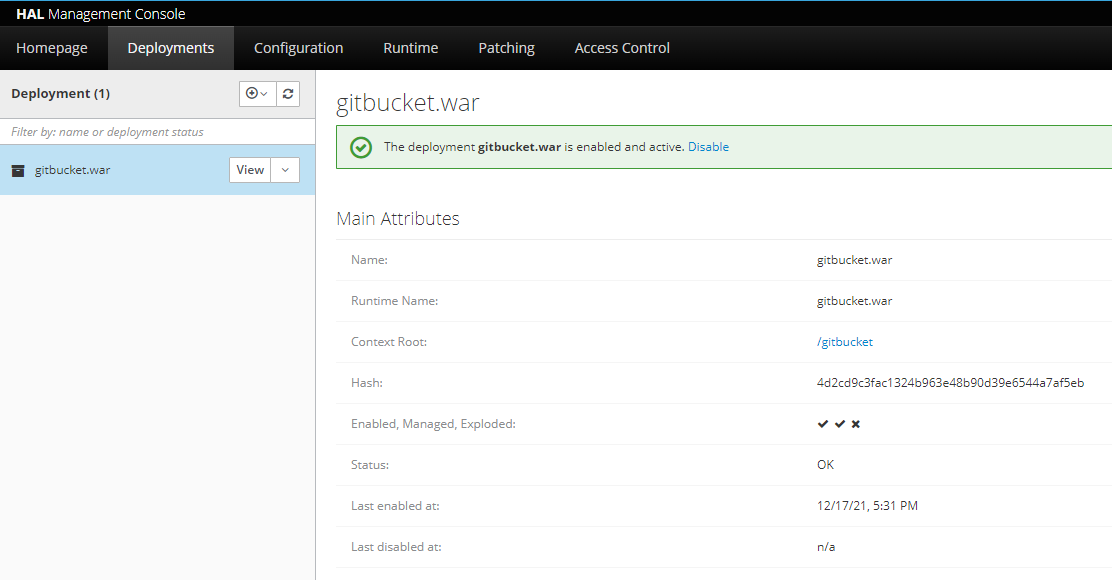
Once deployed, it will show up in deployments and you can manage through the management console
You should now be running GitBucket with WildFly!

Managing with Service Commander (optional)
You can elect to manage your WildFly instance with Service Commander. If you are unfamiliar with Service Commander, you can read more here. The steps to leverage this tool include:
- Install the
service-commanderpackage:
yum install service-commandercdinto your installation’sbin/directory:
cd $WILDFLY/bin- Run the
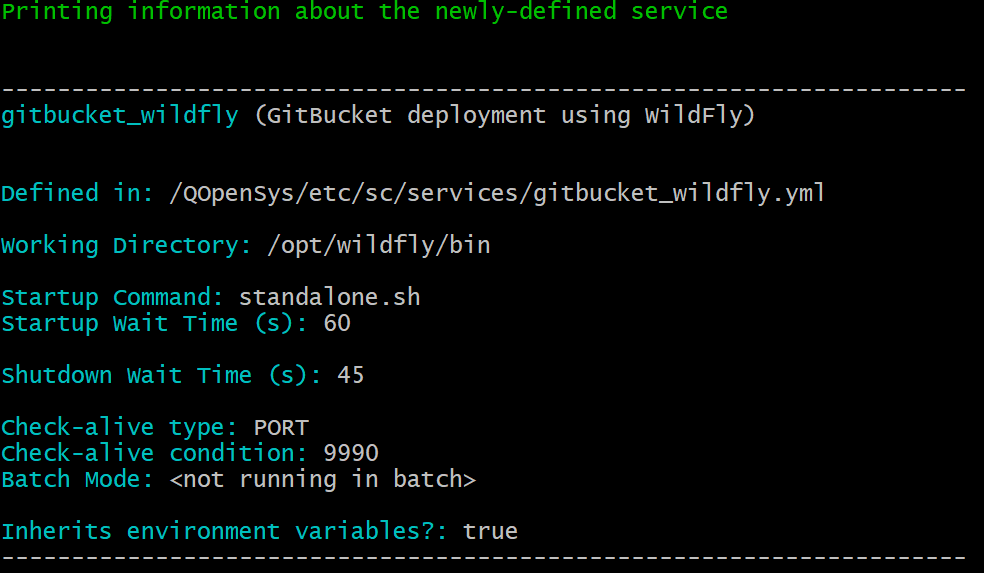
scinitcommand to create a service definition for thestandalone.shcommand. Proceed to answer the questions as in the following screenshot. If you configured the server addresses in step 5:
scinit ./standalone.shIf you did not configure the server addresses, you may specify them on the command-line
invocation using the -b and -bmanagement arguments, for instance:
scinit ./standalone.sh -b 171.20.0.10 -bmanagement 0.0.0.0 It should also print information about where it stored the service definition
Now, you can use the sc command to start, stop, or check on your WildFly instance. Examples:
